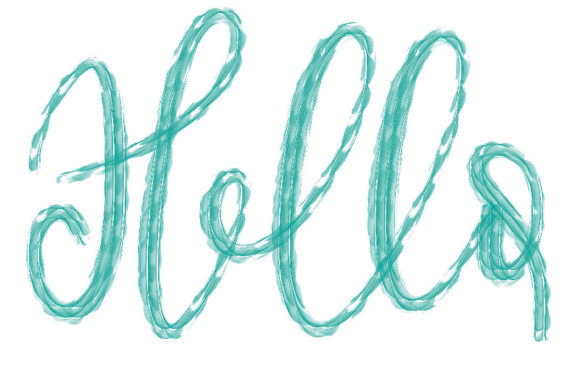
Mastering the Hello Textured Brush in Procreate: A Practical Guide to Authentic Digital Art
Digital illustration has evolved far beyond flat, sterile vectors. Today’s audiences crave authenticity, grit, and the tactile feel of traditional media. This is where the Hello Textured Brush for Procreate becomes an indispensable tool for artists ranging from hobbyists to professional designers. It is not merely a stamp; it is a dynamic engine designed to replicate the unpredictable beauty of physical surfaces. However, simply downloading and applying this brush does not guarantee masterpiece results. Many users stumble over common pitfalls that diminish the brush's potential, leading to repetitive patterns and unnatural-looking artwork.
Understanding how to properly integrate this textured asset into your workflow requires more than just technical know-how; it demands an artistic eye for subtlety. By avoiding frequent mistakes and adopting a more nuanced approach, you can elevate your digital creations from good to genuinely compelling.
The Misconception of One-Click Realism
A prevalent misunderstanding among beginners is the belief that a high-quality texture brush will automatically make a piece look professional. Users often apply the Hello Textured Brush with full opacity and pressure, covering entire backgrounds or subjects in a uniform layer of grain. The result is rarely convincing. Instead of enhancing the art, it often looks like a cheap filter applied in post-production, disconnecting the viewer from the emotional core of the image.
This approach fails because real-world textures are never uniform. Paper fibers vary, paint dries unevenly, and light interacts with surface irregularities in complex ways. When you blanket your canvas with a single texture setting, you lose this organic variation. To correct this, treat the brush as a building block rather than a final coat. Start with low opacity—often between 10% and 30%—and build up layers gradually. This allows the underlying colors and shapes to breathe through the texture, creating depth rather than just surface noise.
Ignoring Canvas Resolution and Scale
Another critical error involves ignoring the relationship between brush size and canvas resolution. The Hello Textured Brush relies on detailed source images to generate its effect. If you use the brush at a tiny size on a massive 4K canvas, the texture may become indistinguishable noise. Conversely, using it at maximum size on a small sketch can result in pixelated, blocky artifacts that break immersion.
Before committing to a final piece, always test the brush scale against your document dimensions. A better approach is to create a separate test layer where you experiment with different sizes. Look for the "sweet spot" where the texture details are visible but not overwhelming. For large-format prints, you may need to adjust the brush settings to ensure the grain remains fine enough to look natural from a viewing distance. For social media graphics, a coarser, more pronounced texture might be appropriate to catch the eye on small screens.
Neglecting Blend Modes and Layer Interaction
Many artists overlook the power of blend modes when using textured brushes. Applying the Hello Textured Brush on a standard "Normal" layer often flattens the color underneath, reducing vibrancy and contrast. This is a missed opportunity for creative integration. The brush is designed to interact with the layers beneath it, mimicking how watercolor sinks into paper or how charcoal catches on tooth.
To achieve realistic results, experiment with blend modes such as Multiply, Overlay, or Soft Light. Multiply is excellent for darkening shadows and adding grit to recessed areas, while Overlay can enhance highlights and mid-tones without obscuring the base color. By changing how the brush interacts with the underlying pixels, you preserve the integrity of your original illustration while adding the desired tactile quality. Always keep your texture on a separate layer so you can adjust opacity and blend modes non-destructively.
Overlooking Pressure Sensitivity and Dynamics
Procreate’s strength lies in its responsiveness to the Apple Pencil, yet many users fail to customize the dynamics of the Hello Textured Brush. Leaving pressure sensitivity at default settings can lead to a static appearance, where every stroke looks identical regardless of how hard or soft you press. This lack of variation kills the illusion of traditional media.
Dive into the brush studio and adjust the pressure curves for size, opacity, and scatter. For instance, linking opacity to pressure allows you to create faint, whisper-like textures with a light touch, while pressing harder deposits dense, rich grain. This dynamic range is essential for creating visual interest and guiding the viewer’s eye. Spend time calibrating these settings to match your personal drawing style. A heavy-handed artist may prefer a stiffer pressure curve, while those who favor delicate lines might opt for a more responsive, sensitive setup.
Failing to Combine with Other Tools
Relying solely on one brush, no matter how versatile, limits your artistic vocabulary. The Hello Textured Brush shines brightest when used in conjunction with other tools. A common mistake is trying to achieve both structure and texture with the same instrument. This often leads to muddy forms and unclear definitions.
Instead, use clean, hard-edged brushes to establish your composition and values first. Once the foundation is solid, introduce the Hello Textured Brush to add atmosphere and materiality. You might also combine it with smudge tools to blend the texture into the paint, softening harsh edges and creating a more cohesive look. Think of the texture brush as the seasoning in a dish—it enhances the main ingredients but should not overpower them.
What to Check Before You Commit
Before purchasing or heavily investing time in learning the Hello Textured Brush, consider your specific needs. Are you creating comic books, concept art, or social media graphics? Each medium has different texture requirements. Review the brush’s documentation to understand its intended use cases. Check if the creator provides updates or support, as Procreate updates can occasionally affect brush performance.
Additionally, evaluate your hardware. While Procreate runs on various iPad models, older devices may struggle with complex, high-resolution texture brushes, leading to lag or delayed stroke rendering. Ensure your device can handle the computational load of real-time texture generation to maintain a smooth workflow.
Ultimately, the Hello Textured Brush is a powerful ally in the quest for authentic digital art. By avoiding the traps of uniform application, ignoring scale, and neglecting layer dynamics, you can unlock its full potential. Approach it with patience and experimentation, and it will reward you with illustrations that feel tangible, alive, and distinctly human.