Mastering Photoshop Overlay Bubble Overlays for Realistic and Creative Designs
There is a specific kind of magic captured in the iridescent shimmer of a soap bubble. The way light refracts through that thin, transparent sphere creates a dazzling play of colors that can instantly elevate a flat photograph into something dreamy and ethereal. For digital creators, Photoshop Overlay Bubble Overlays offer a shortcut to capturing this ephemeral beauty without the logistical nightmare of blowing actual bubbles during a photoshoot. Whether you are designing assets for a spring campaign, enhancing portraits for a children’s party album, or adding a whimsical touch to summer social media posts, these overlays provide a versatile solution.
However, simply downloading a pack of images and dragging them into your workspace does not guarantee professional results. Many beginners and even some experienced designers overlook critical technical details that determine whether the final composition looks like a high-end editorial piece or a clumsy digital collage. Understanding the nuances of resolution, file formats, and blending modes is essential to leveraging these tools effectively.
The Trap of Low-Resolution Assets
One of the most common mistakes creators make is prioritizing quantity over quality when selecting overlay packs. It is tempting to grab free resources that offer hundreds of low-resolution thumbnails, but this approach often leads to pixelated, unprofessional outcomes. When you stretch a small image to fit a high-definition canvas, the edges of the bubbles become jagged, and the delicate color gradients turn into blocky artifacts.
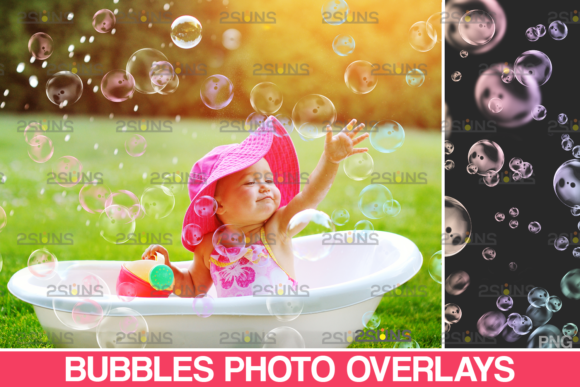
To avoid this, always verify the specifications before downloading. A premium pack, such as one offering 30 Bubble Overlays png file assets at 300 DPI with dimensions of 6000x4000px, ensures that you have enough data to work with. High resolution allows you to scale the bubbles up or down without losing clarity. This is particularly important if you are printing your designs or displaying them on large 4K monitors. A high-resolution Soap bubble transparent png file retains its crispness, ensuring that the intricate reflections and highlights remain sharp, regardless of how you resize them within your composition.
Misunderstanding File Formats and Compatibility
Another frequent oversight involves file format compatibility. While PNG files with transparent backgrounds are the gold standard for overlays because they allow immediate placement without extra masking steps, many packs also include JPG files. Some users dismiss JPGs entirely, assuming they are inferior. However, JPGs included in high-quality packs are often provided on black or white backgrounds specifically to utilize blending modes like "Screen" or "Multiply."
If you are using software that supports layers, such as Photoshop, Photoshop Elements, Paint Shop Pro, or PicMonkey’s Photo Editor, you can easily integrate these files. The key is knowing which mode to use. For bubbles on a dark background, setting the layer to "Screen" makes the black disappear, leaving only the luminous bubble. Conversely, if you are working in Lightroom, you must note that it does not natively support layers in the same way. Lightroom users need a specific plugin that allows layer work, or they should edit the photo in Photoshop first. Ignoring this limitation can lead to frustration and wasted time trying to force a workflow that the software does not support.
Ignoring Lighting and Perspective Consistency
Even with the highest quality Bubbles photo overlay, your design will look fake if the lighting and perspective do not match the base image. A common error is placing bubbles that are all the same size and focus level across the entire frame. In reality, bubbles vary in size, and depth of field affects their appearance. Bubbles closer to the camera should be larger and potentially slightly out of focus if your subject is further away, while those near the subject should be sharper.
To create a realistic Nature bubble Photo effect, pay attention to the direction of the light source in your original photo. If the sun is coming from the left, your bubbles should have highlights on the left side. Most high-quality overlay packs include bubbles with various lighting angles, but you may need to rotate or flip them to match your scene. Additionally, adjust the opacity of the overlay layer. Rarely should an overlay sit at 100% opacity; dialing it back to 70–85% often helps the bubbles blend more naturally with the ambient light of the photograph.
Overlooking Color Harmony
The most attractive thing about soap bubbles is the dazzling play of all colors in a transparent sphere, but this rainbow effect can clash with your image if not managed correctly. Beginners often leave the default colors of the overlay, which can introduce unnatural hues into a carefully color-graded photo. If your image has a warm, golden-hour tone, cool blue or green reflections in the bubbles might look disjointed.
Use adjustment layers to harmonize the colors. You can clip a Hue/Saturation or Color Balance adjustment layer to your bubble overlay to tweak the tones until they complement the rest of the image. This step transforms the overlay from a sticker slapped on top to an integrated part of the scene. It ensures that the cool party effect or serene natural vibe remains consistent throughout the design.
Choosing the Right Tool for Your Skill Level
Not everyone needs the full power of Adobe Photoshop. If you are a blogger or small business owner looking for quick enhancements, user-friendly editors like PicMonkey or Canva (if supported) might suffice. However, ensure the photoshop brushes or overlay files you purchase are compatible with your chosen platform. The versatility of a pack that includes both transparent PNGs and JPGs means it can adapt to various workflows. For those using AdobeStock or similar platforms, checking the license terms is also crucial to ensure you can use the assets for commercial projects if needed.
Ultimately, the goal is to enhance your storytelling. Whether you are creating an advertisement for a summer beverage or a sentimental family portrait, the bubbles should add emotion, not distraction. By selecting high-resolution assets, respecting lighting physics, and ensuring software compatibility, you avoid the pitfalls that plague amateur designs. Take the time to evaluate your tools and techniques, and you will find that these simple overlays can become a powerful component of your creative toolkit.
Before you finalize your purchase or download, check the preview images closely. Look for variety in the pack—do the bubbles vary in size and cluster formation? Are there close-ups and wide shots? A diverse pack gives you the flexibility to build depth in your compositions. Remember, the best designs are those where the viewer feels the atmosphere rather than noticing the editing tricks. With the right approach to Photoshop Overlay Bubble Overlays, you can achieve that seamless, magical realism that captivates audiences.